Hello Folks,
After a long while, We are back to share interesting tutorials with all of you. I got few beautiful requests about this tutorial.
So Today we will learn how to configure stand alone Tomcat with IntelliJ IDE(Ultimate Edition). I'm assuming you are working with some Java web project(Spring, Struts, Play, etc) and you need to configure standalone Tomcat with IntelliJ IDE.
Step-1:
Download Tomcat from their official site or mirror site . and then extract it in appropriate directory.
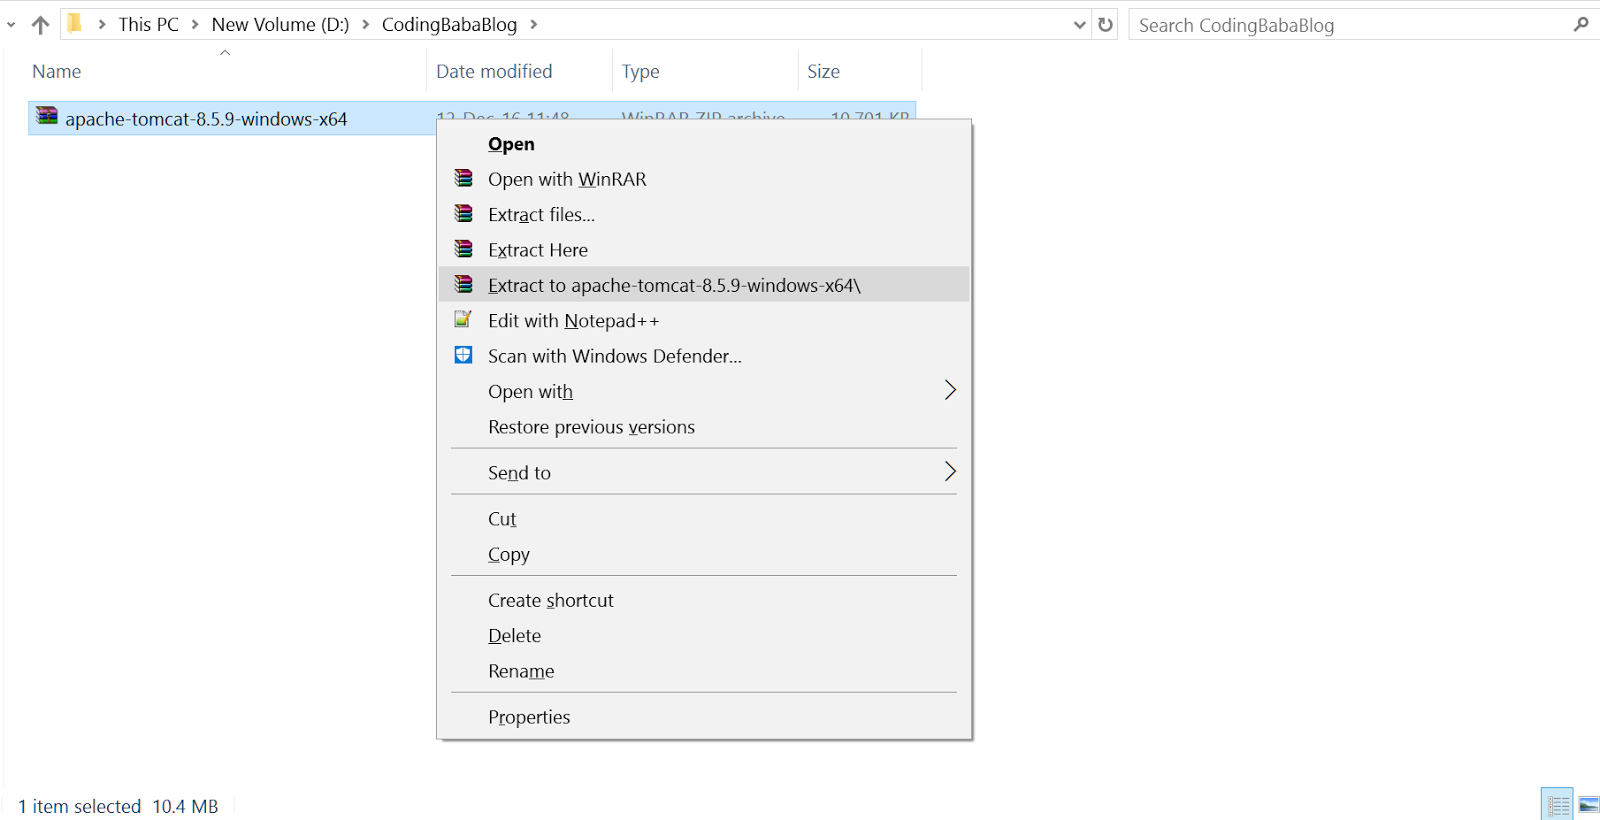 |
| Extract Tomcat |
 |
| Extracted Tomcat |
Step-2:
Go to
File > Setting > Build,Execution,Deployment >>Application Server
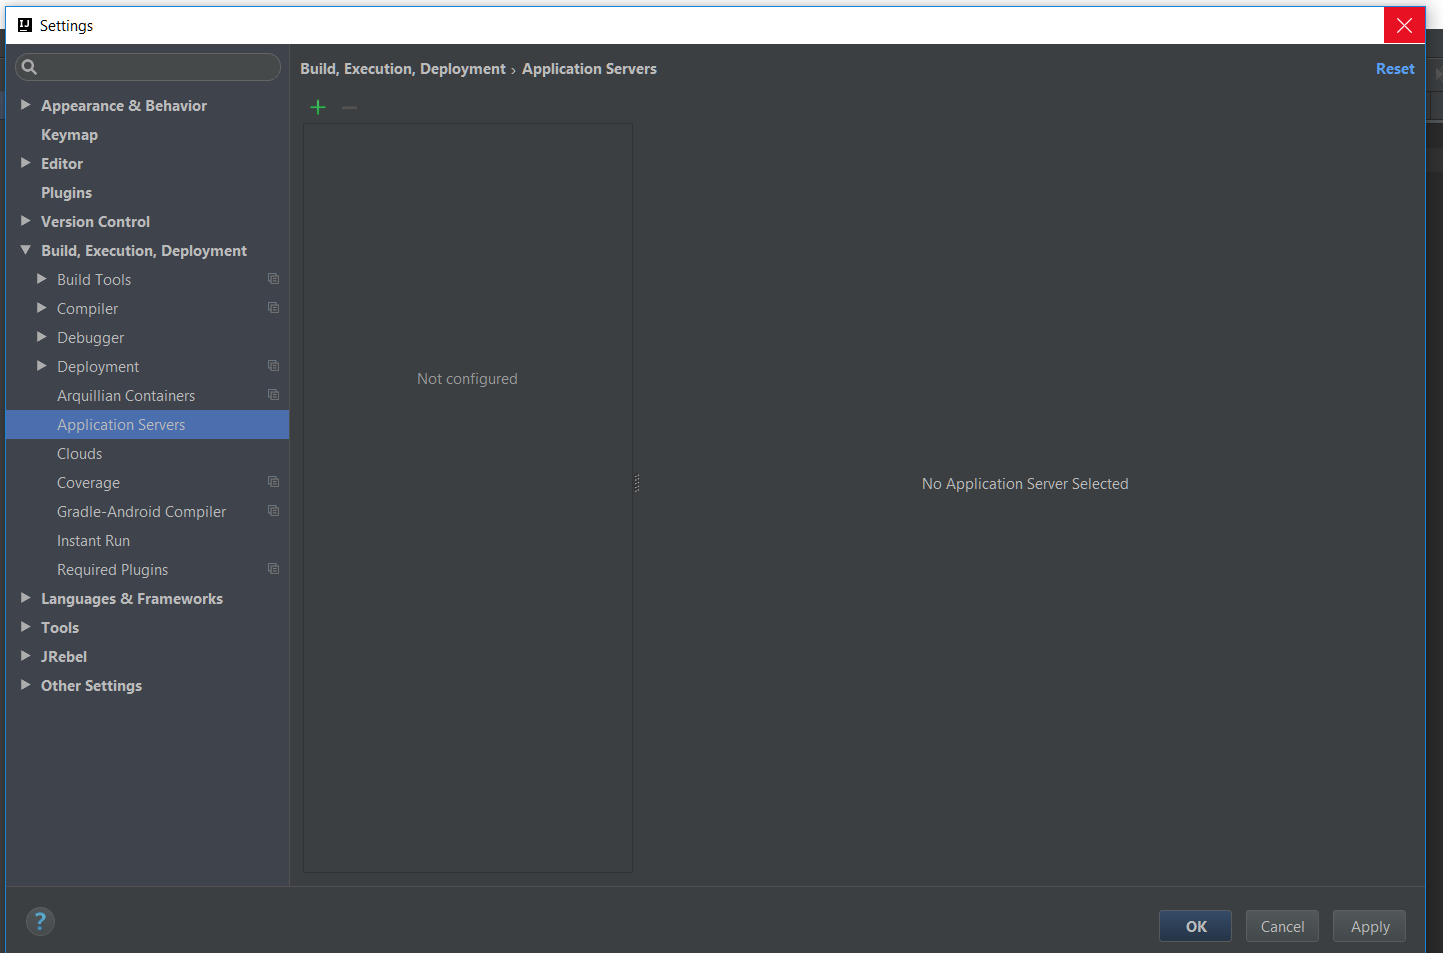 |
| Setting of IntelliJ |
Step-3:
Click on
+ to add new Tomcat server.
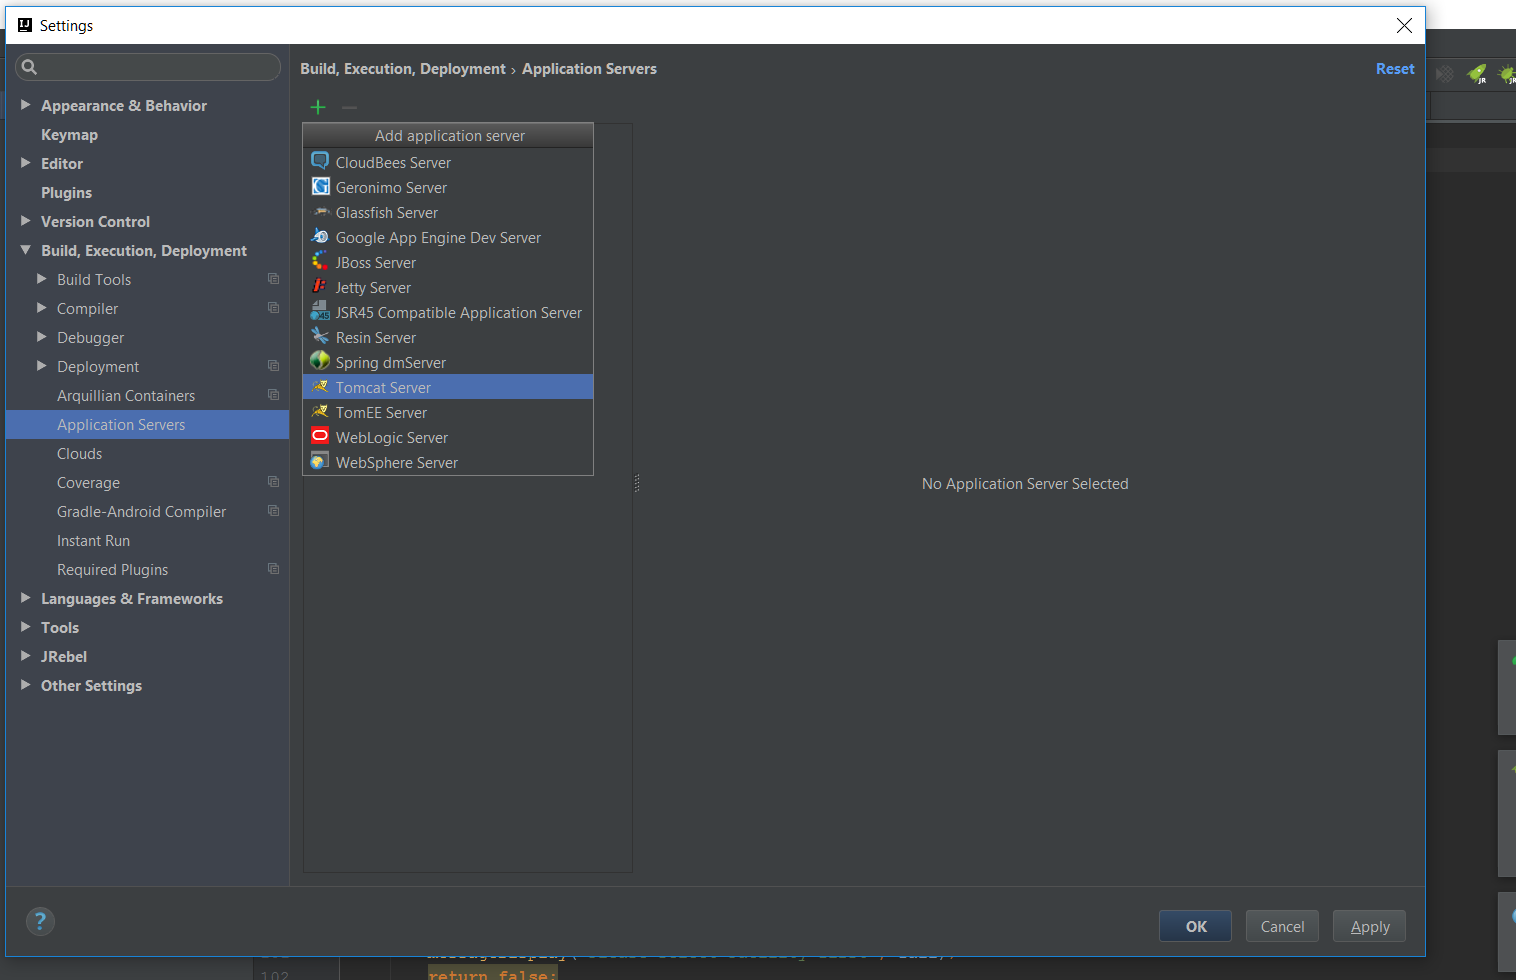 |
| Add application server |
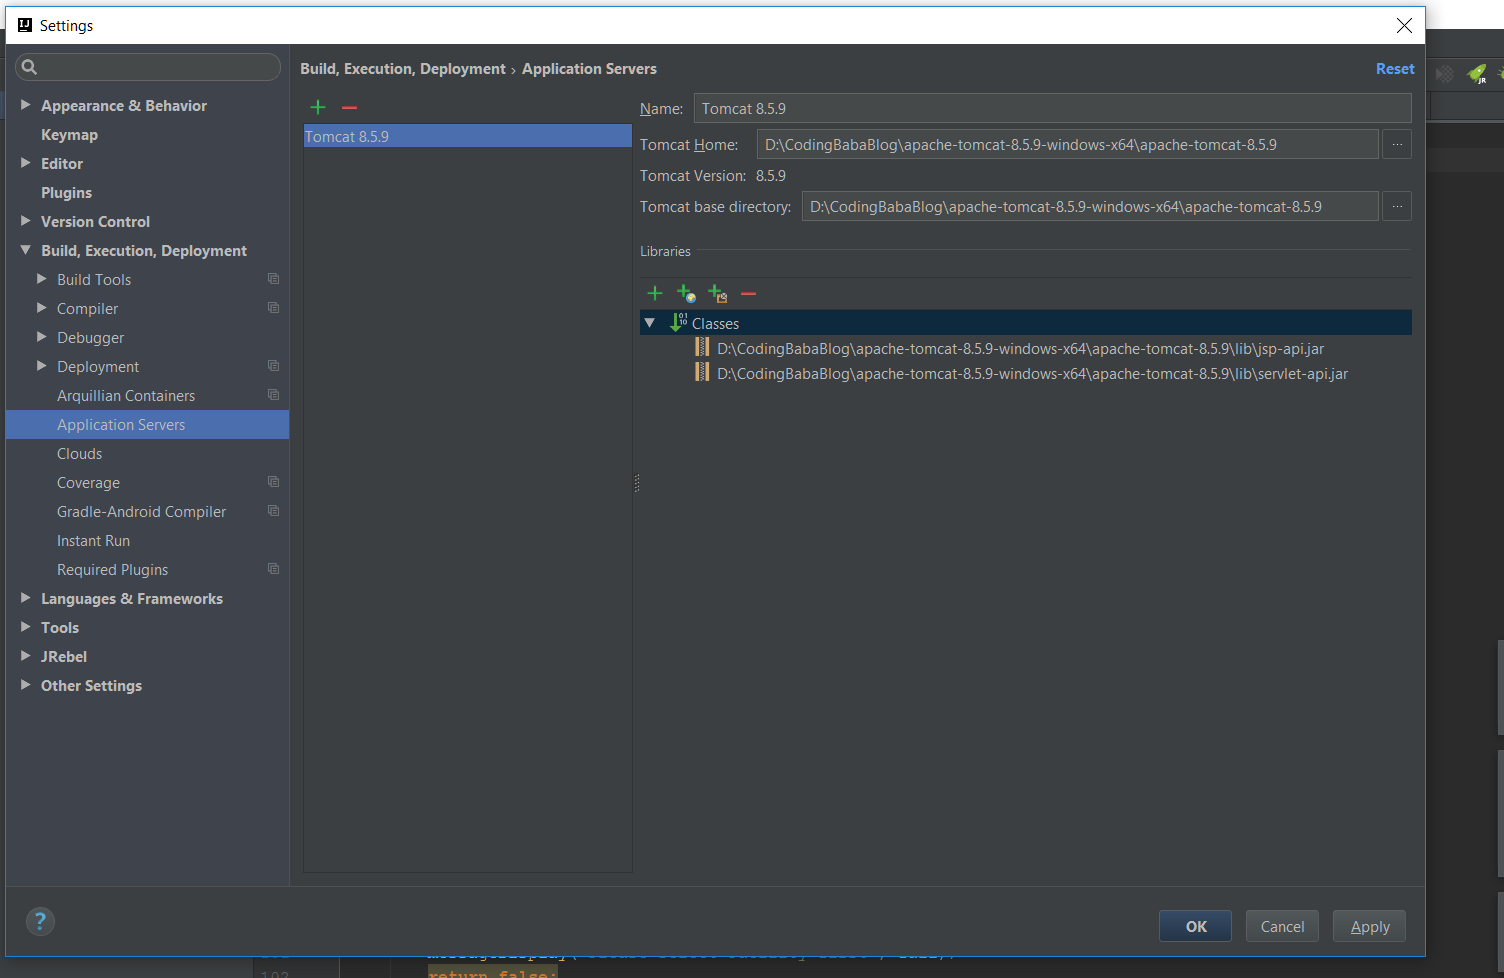
Step-4:
Select
Tomcat Home as path to extracted Tomcat server directory.
 |
| Tomcat Home |
 |
| Tomcat directory path in IntelliJ |
Step-5:
Now we need to create new Run/Debug configuration to run/debug our project under this standalone tomcat server.
Go to
Run > Edit Configuration
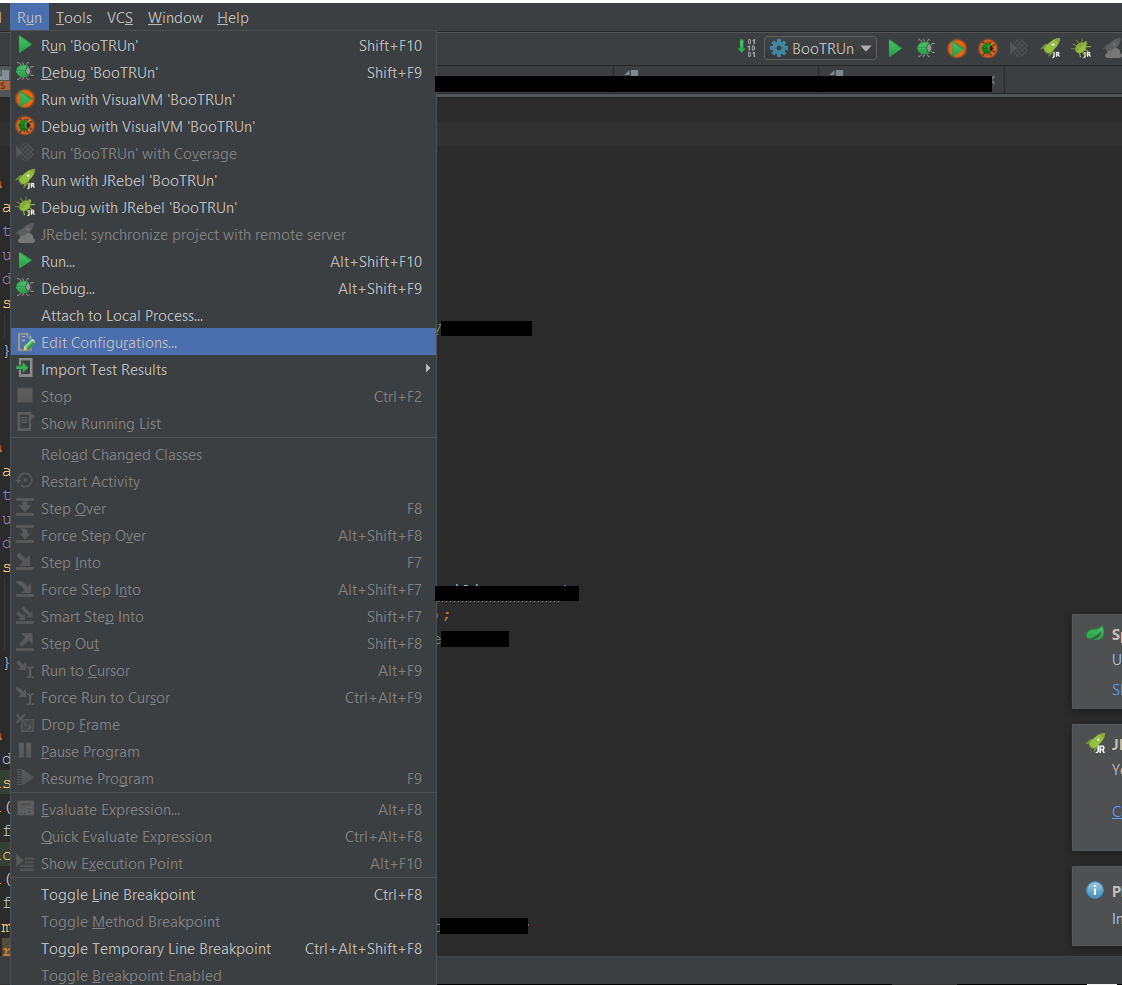 |
| Edit Config in IntelliJ |
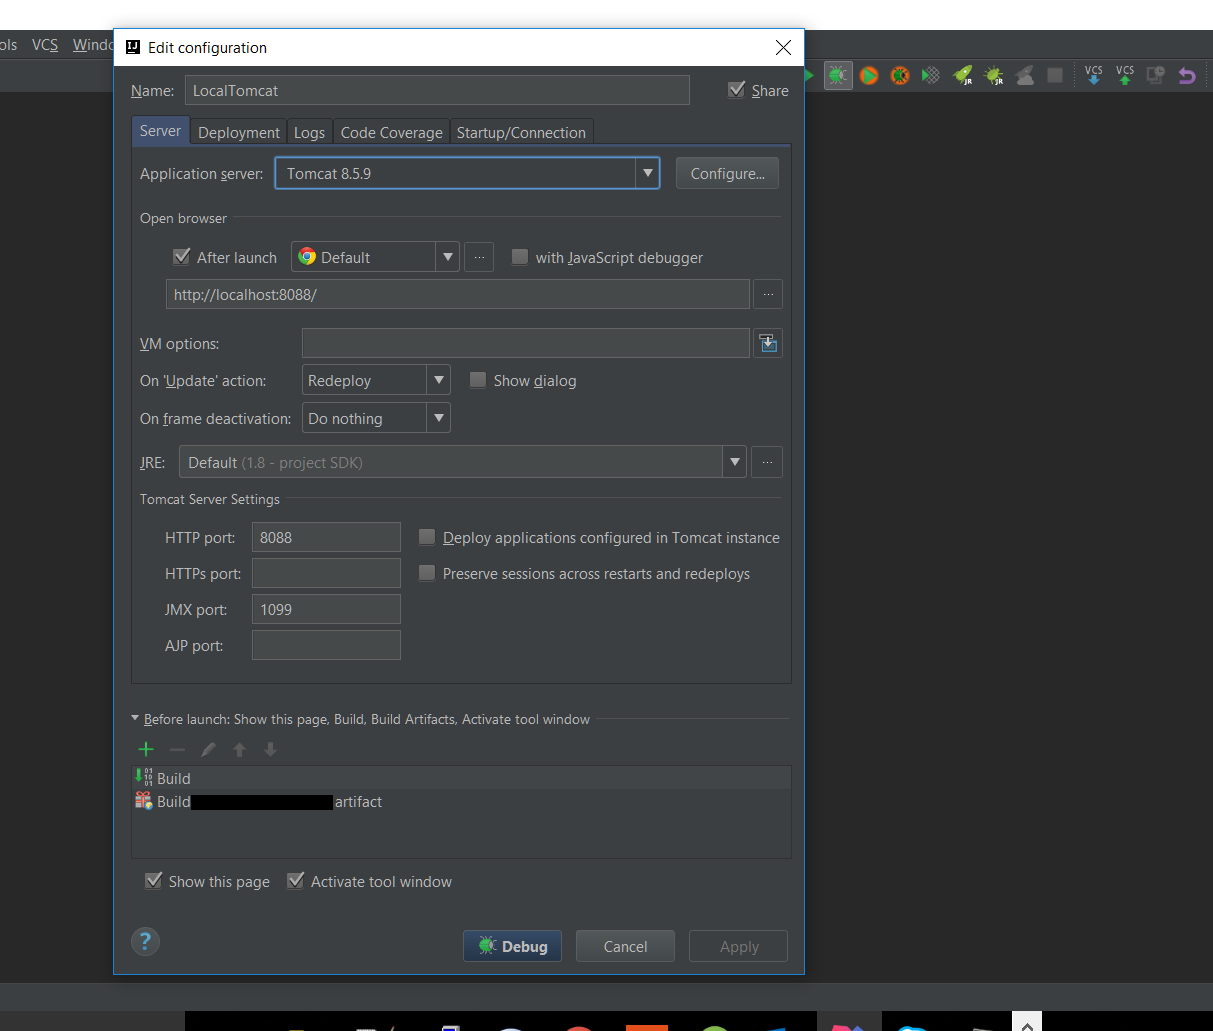
Step-6:
Self explanatory screenshot of Tomcat configuration.
 |
| Tomcat Configuration in IntelliJ |
Step-7:
So now Run/Debug your project under Tomcat server.
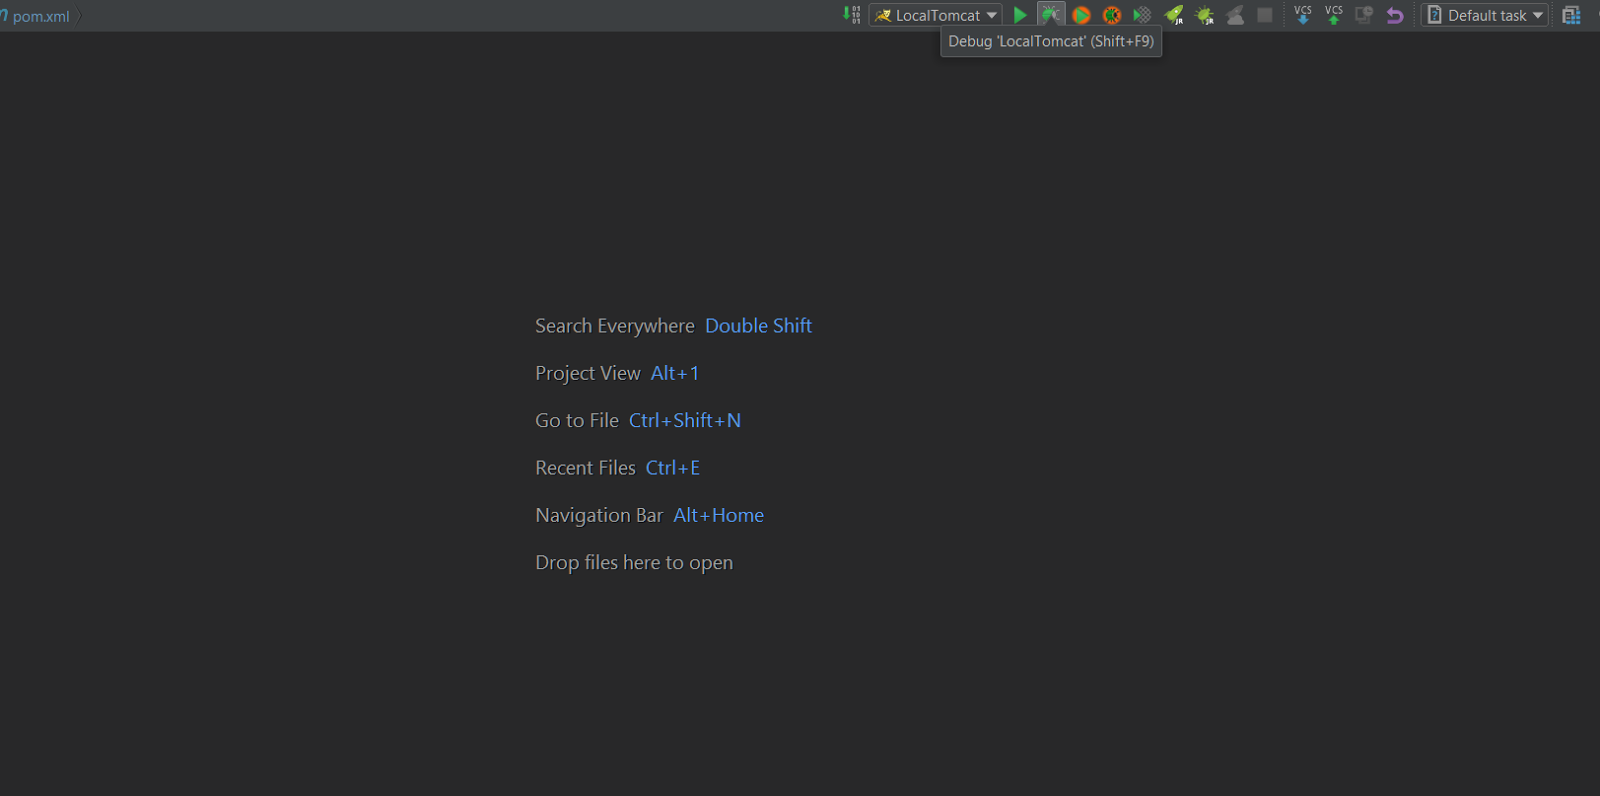 |
| Run/Debug your project |
Step-8:
Now just click on
Debug
 |
| Review Tomcat server config |
I made this tut with relatively less text just to make it more simple. If you got any query/doubt please drop your comment here.

 So Today we will learn how to configure stand alone Tomcat with IntelliJ IDE(Ultimate Edition). I'm assuming you are working with some Java web project(Spring, Struts, Play, etc) and you need to configure standalone Tomcat with IntelliJ IDE.
0 comments:
Post a Comment